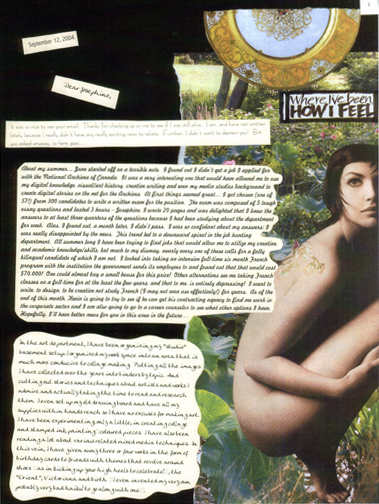
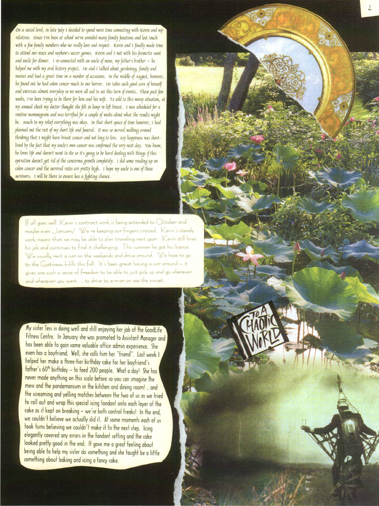
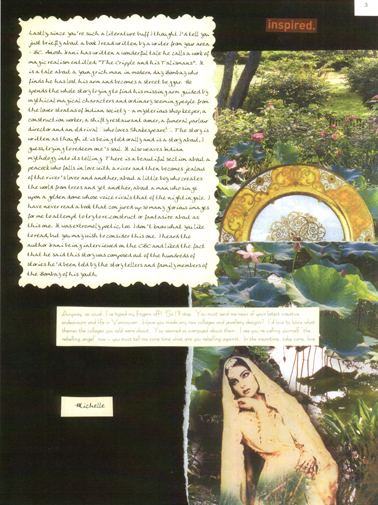
Another period of studio clean up has gone by in a flash! This week the arduous task of sorting through umpteen boxes of supplies began. I love this stage because it’s a lot like unearthing buried treasure. I’m finding all kinds of materials and past work I’d long forgotten. For instance, I ran across some collage stationary I’d made several years ago. I even had the body of a letter I’d included in it to a friend. It was from a rather tumultuous year in my life when I’d had a close brush with cancer which fortunately turned out to be nothing to worry about. It’s funny how one can bury away those traumatic memories. Anyway, as a result of it I decided to make some much needed changes in my life: the most important one being to begin to do away with my pessimistic outlook on life. Coincidentally it was also the same period that I began sorting and organizing my studio and art supplies for the first time – it was my way of saying I was taking myself more seriously as an artist. It was also a magical time. I had just finished reading Anosh Irani’s The Cripple and His Talismans: a fictive tale of a young man who travels upon an incredible journey of self-discovery through Bombay looking for his lost arm! Since it was a tale set in India, the land of my heritage, it conjured up all kinds of visions that made my collaging spirit more adventurous. The stationary I made that year was the direct result of the creative energy I drew from Irani’s story.
I remember I had sent that letter to my good friend Josephine: a watercolourist and jewellery maker who made the most exquisite art. At 50 years of age, she and her family moved from Ottawa to British Columbia on the west coast to begin life anew. For a few years after this, she’d send me the most beautiful handcrafted gifts; one year she made me a hanging mobile of sea shells and driftwood from a nearby beach which she had entwined with Swarovski crystals which still hangs in my studio today. She spoiled me so much! As you can imagine, in response, no ordinary store-bought stationary or thank you card would do. I reciprocated Josephine’s kindness with some of my own art… and I tried to be as adventurous as she was in her art making – she was so inspirational! That’s when I came upon the idea of making my own stationary; something that would give her visual insight into my mental and emotional worlds that transformative summer.
Although we live in an age where digital media supersedes our need for paper, I love to send handmade letters and cards to special friends whenever I can. I want them to feel loved and I want my thoughts and feelings to be concretized in some physical form rather than be swallowed up in a sea of digital information. Digging up the letter brought back such memories and it also has me thinking of new designs for stationary. So today I thought I’d share some tips for making your own.
Collaging Your Own Stationary: Eight Easy Steps
That’s it! Have fun designing your own stationary! Feel free to email me for further clarifications.
Here’s a sample of my three-page letter to Josephine above. If you make or have made your own stationary, I’d love to hear about it. In fact, I think I’ll give away a free sample of my next collage stationary design to the first person that sends me a comment about this blog entry!


Annelies, I’m so glad you were inspired by my post! I hope you will send me a photo of your collage stationary before you send it to your sister — I’m sure she will love it! Thanks so much for stopping by my blog. If you have any questions while you’re making it, do let me know. Best wishes, Michelle
Hi Michelle,
What a nice surprise to receive mail from you! I have plugged away at making my own stationary and now am inspired with your instructions to “get it done”. I will do this project over the 2 week Christmas break coming up. I am going to keep the incoming Christmas cards that have beautiful images on them to make my stationary with!!!!!
Love ya Michelle,
Joyfully,
Ruth Ann
Hi Ruth Ann, So wonderful to hear from you! I’m so pleased to hear you’re inspired to try making your own collage stationary out of your Christmas cards — what a great way to recycle them! I hope you will send me a photo of the finished results — I would love to see it. If you have any further questions about putting them together, don’t hesitate to let me know. Much love back, Michelle